Project Iteration 1
This Iteration Goals
Our goal for the first iteration of the project was threefold:
-
Create a basic interface for coloring that allows the user to engage and disengage with a coloring mode, move between bounded areas, switch colors, and change brush tips (Linnea)
-
Explore different methods of interacting with walls (Marco)
-
Explore different textures to color on, i.e. different “paper” textures, and to color with, i.e. different “material” textures (Preeti)
Since we had three discrete goals, we split said goals up amongst ourselves (assignments are noted in parentheses).
Technical Approach and Findings
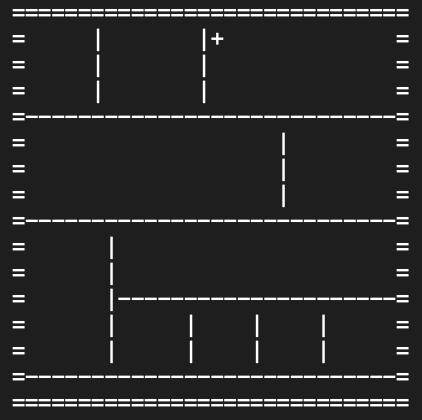
After discussing with Marco and Preeti, we decided to use my maze generator from Lab 2 as a starting point for our coloring interface.
Preeti - texture explorations
Preeti created a simple layout and began playing around with using images as visual brush textures. She originally had some trouble with the canvas not recording the playerToken’s movements, but after some trial and error realized that the issue was redrawing the whole background every draw() cycle.
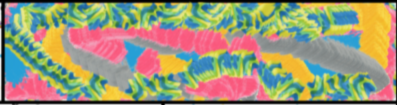
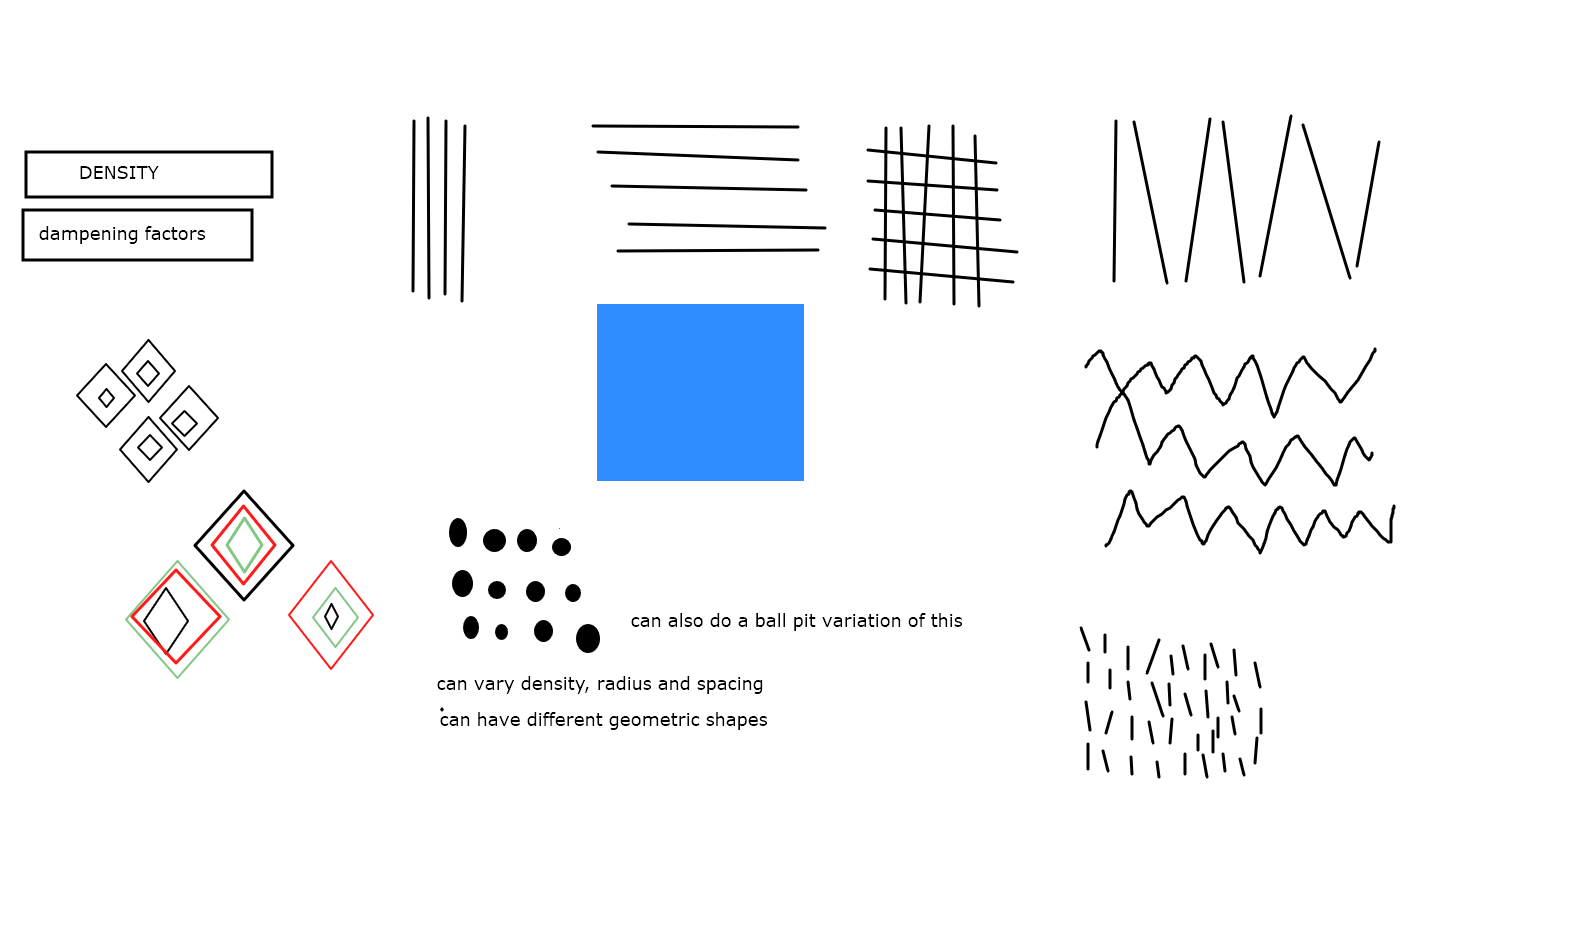
Preeti then began exploring different haptic texture options that could be used for both background texture and drawing texture.
During another group meeting, we brainstormed several texture ideas for Preeti to continue her explorations.
Marco - wall interaction explorations
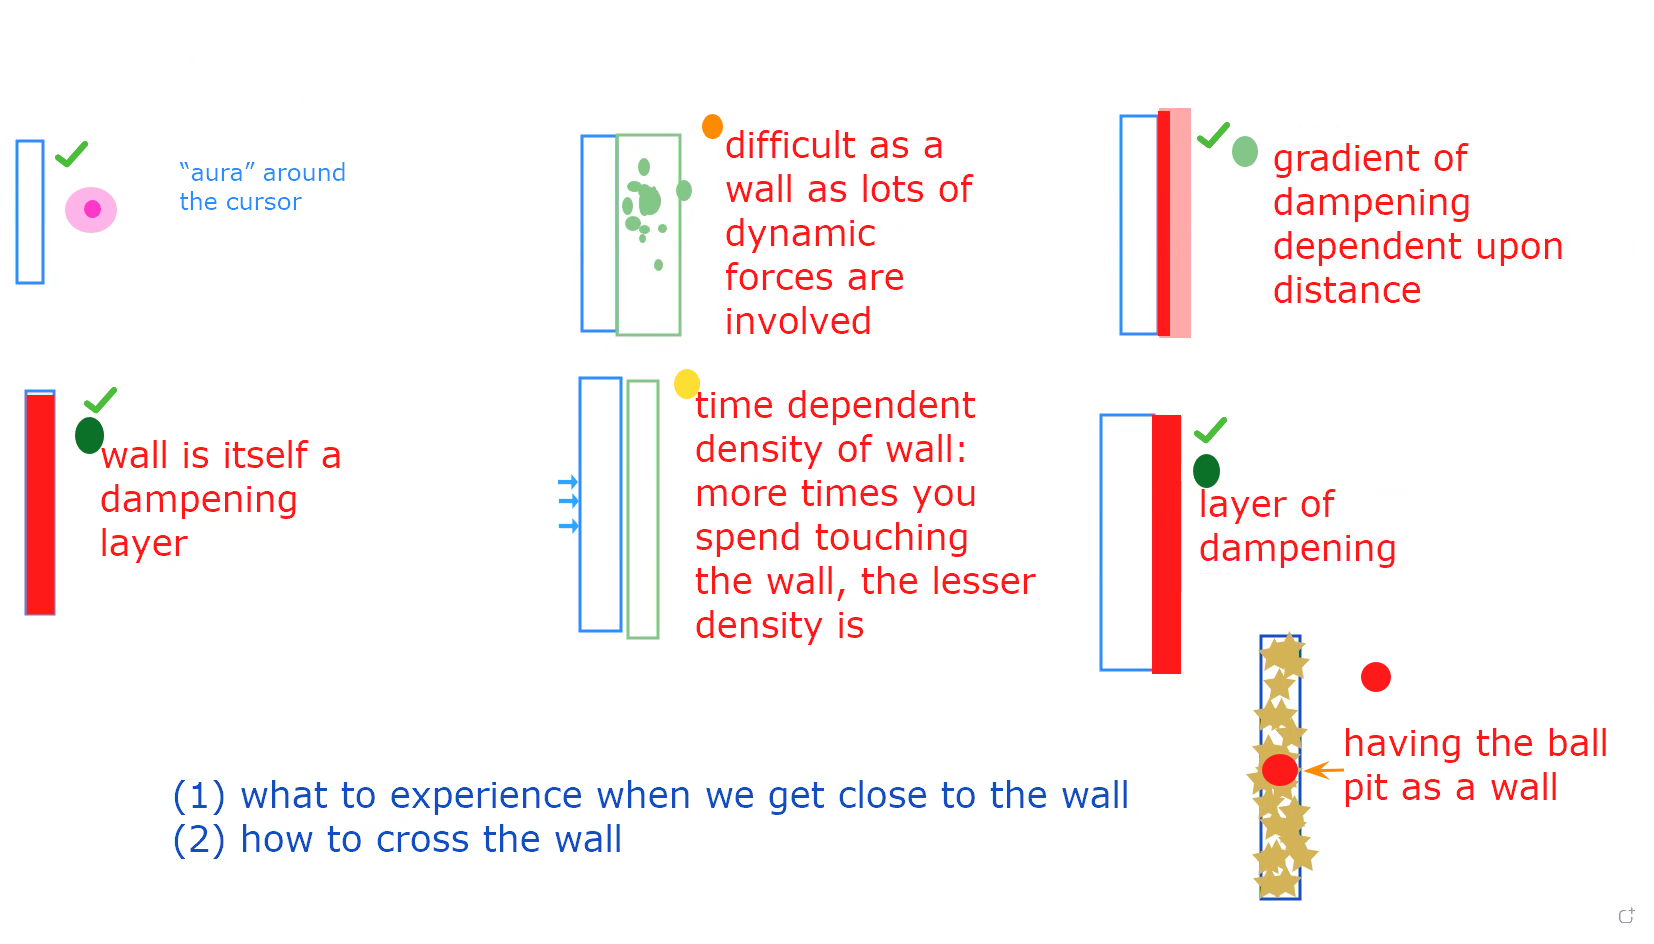
Marco meanwhile began playing with how to get the Haply to interact with walls. We did not want interacting with walls to feel jarring, so Marco explored a few different options for mitigating the harshness.

Marco originally explored keeping track of the closest wall to the playerToken at all times, but decided that involved too many calculations. He realized that adding a halo around either the playerToken or the walls could be more effective and began exploring that route instead.
During another group meeting, we brainstormed several wall interaction ideas for Marco to continue his explorations.
Linnea - interface explorations
Planning
I began by using the 10 x 10 method I learned in the HCI class I took last semester to brainstorm some interface interaction ideas.

Many of my ideas were infeasible or overly complicated, but a few ideas seemed promising, such as playing with key bindings and being able to pass through walls somehow.
Toggling keyboard interactions
I decided to start simple and use keyboard interactions to trigger different events. I used Processing’s built-in KeyPressed() function to set up my keyboard shortcuts:
void keyPressed() {
  if (key == ' ') { // pressing spacebar makes walls flexible
    if (isDrawingModeEngaged()) {
      disengageDrawingMode();
    } else {
      engageDrawingMode();
    }
  }
  if (key == 'c' || key == 'C') { // pressing c changes to a random colour
    setDrawingColor((int)random(255), (int)random(255), (int)random(255));
  }
  if (key == 'v' || key == 'V') { // pressing v changes to a random shape
    shape = (shape + 1) % (NUM_SHAPES);
  }
}
I set the spacebar to toggle a coloring mode on and off, ‘c’ to randomly change the color, and ‘v’ to swap between a circle and a square brush tip.
Indicating mode
To visually indicate which mode the user is in, I wanted to change the wall color to a bright green when coloring mode is disengaged. I used a HashMap to link the internal Wall representation of each wall with the visual FBox representation. When the spacebar is pressed, I loop through the ArrayList of Wall objects, get the FBox representation from the HashMap, and set the color to the desired color (bright green or black depending on what mode is engaged):
void setWallFlexibility(boolean flexibility, int wallColor) {
  FBox wallInWorld;
  for (Wall item : wallList) {
    wallInWorld = wallToWorldList.get(item);
    wallInWorld.setSensor(flexibility);
    wallInWorld.setFillColor(wallColor);
    wallInWorld.setStrokeColor(wallColor);
  }
}
Exploring brush shape and color
I decided to disable Preeti’s texture explorations for the moment. I liked the idea of visual texture as part of the brush options, but I thought it would be easier to work with basic shapes as I explored changing the brush color. Instead of attaching images to the HVirtualCoupling itself, I used the playerToken position to draw an object of the desired shape at the same position. I created two basic brush options for coloring mode – a circle and a square drawing tool – and a cursor for when coloring mode is disengaged:
void drawCursor(PGraphics layer) {
  layer.ellipse(playerToken.getAvatarPositionX()*40, playerToken.getAvatarPositionY()*40, 2, 2);
  world.draw();
}

void drawCircle(PGraphics layer) {
  layer.ellipse(playerToken.getAvatarPositionX()*40, playerToken.getAvatarPositionY()*40, 20, 20);
  world.draw();
}

void drawSquare(PGraphics layer) {
  layer.rect(playerToken.getAvatarPositionX()*40-10, playerToken.getAvatarPositionY()*40-10, 20, 20);
  world.draw();
}
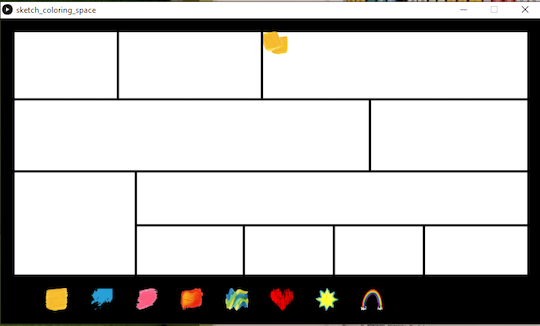
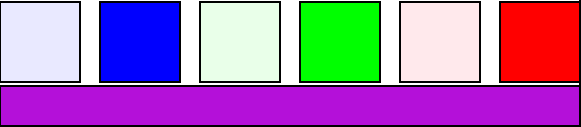
I also created six color swatches and a color mixer swatch at the bottom right of the screen. I do not want to rely on keyboard shortcuts long term, so I thought it would make more sense for the user to “dip their brush” into “buckets” to add or subtract red, green, and blue. The color mixer swatch updates the mixed color in real time.
Creating layers
One big issue I ran into was figuring out how to save the coloring trails while not saving the cursor trails.
While it was relatively simple to figure out how to change colors and place shapes at the playerToken’s position, I struggled with helping the program discriminate what to save. I eventually figured out that I needed to create drawing layers!
Processing frustrations: a short aside
One of my biggest frustrations with Processing is that by attempting to simplify programming, the developers have ended up obfuscating some potentially important information. In my case, the obfuscated information was that the default canvas that pixels get recorded to is called g! Any time a Processing-specific method such as background(<color>) is called, it affects g. The secret I learned is that these methods can also affect other layers, so if you have another layer called topLayer, then topLayer.background(<color>) changes the background of topLayer instead of g!
Layers upon layers
I decided I needed three layers (ordered top to bottom):
- a layer to display the cursor every time coloring mode is toggled off
- a layer to incrementally color on every time coloring mode is toggled on
- a layer to white-out and load the accumulated color onto each draw cycle
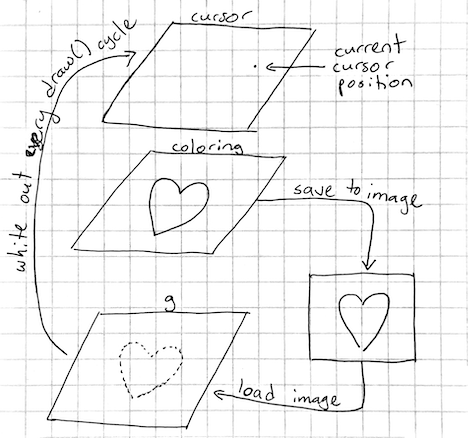
I created an array of layers, with g as the 0th layer. Each draw cycle, I set g’s background to white so as to remove any cursor trails, and load the image from layers[1], the coloring layer. If coloring mode is toggled on, then the current brush is displayed and the color trail is saved to layers[1]. If coloring mode is toggled off, then the cursor is displayed on layers[2]:
void createLayers() {
  layers[0] = g;
  layers[1] = createGraphics((int)worldWidth*40, (int)worldHeight*40 + 2);
  layers[2] = createGraphics((int)worldWidth*40, (int)worldHeight*40 + 2);
}

void draw() {
  g.background(255);
  image(layers[1], 0, 0);
  if (isDrawingModeEngaged()) {
    layers[1].beginDraw();
    layers[1].noStroke();
    int[] c = getDrawingColor();
    layers[1].fill(color(c[0], c[1], c[2]));
    drawShape(layers[1]);
    layers[1].endDraw();
    image(layers[1], 0, 0);
  } else {
    layers[2].beginDraw();
    layers[2].clear();
    layers[2].background(0, 0);
    layers[2].stroke(255, 0, 0);
    drawCursor(layers[2]);
    layers[2].endDraw();
    image(layers[2], 0, 0, width, height);
  }
  world.draw();
}
Putting it all together

My code can be found here.
Lessons Learned
I think we achieved a significant amount this iteration. I believe Preeti and Marco’s explorations have put us in a good spot to begin putting all the pieces of our design together. Furthermore, I think my accomplishments this iteration have laid the groundwork for augmenting our design.
One of the major lessons I learned this iteration was that sometimes tools that are created in attempts to streamline processes can unintentionally be a hinderance.
I think the biggest obstacles we have moving forward are keeping our design simple and converging towards pleasing textures to interact with. We will need to explore whether it is more pleasing to have a brush texture interacting with a background texture or to have only one of the two. I do not want to end up with an overload of coloring options and texture sensations. At the same time, I would like to keep as many interactions as possible relegated to the Haply so as to not inundate the user with having to remember too many control options. Our stated goal was to create a tool for mindfulness, anxiety reduction, and fine motor skill training and it is important we do not stray too far from this goal by adding in extraneous options.
Next Iteration Goals
My next iteration goals are to:
- Implement the interaction of touching the color swatch and changing the mixed color. At the moment, only the random color functionality is implemented.
- Re-add in Preeti’s idea of texture swatches. My current idea is to have a variety of transparent grayscale texture swatches that can be layered over my basic colorful shape brushes.
- Implement “clear” and “erase” functionality. Also perhaps changing brush size.
- Explore a “save” functionality. Now that I know how
PGraphicsobjects work, I think it should be relatively straightforward to save the image onlayers[1]to a file. - Begin integrating my interface with what Marco and Preeti have been working on.
No comments
Comments are closed